Before you begin
- Have a valid, unexpired government-issued ID ready if your request includes a document check. The verification screen will show the accepted documents for your country.
- Use a phone or computer with a working camera, a stable internet connection and good lighting. Keep your phone nearby if a verification code is required.
- Be ready to provide your legal name, date of birth, home address and any other information requested. Check dates and spelling carefully.
- Open only a link you were expecting. If you do not recognize the organization, contact it through a known contact channel before entering personal information.
For clients
Complete the steps shown in your request
1. Open your verification link
Open the complete link from your invitation. Check the organization’s name. If your browser shows a connection or certificate warning, stop and contact the organization before continuing.
2. Read the terms and give your consent
Read the terms and consent information on the page. Enter your full name and select the consent checkbox only if you agree. Select “Agree and continue” to proceed. If you have questions about your information or do not wish to consent, contact the requesting organization before continuing.
3. Confirm your personal information
Enter the information requested on screen. Use your legal name as it appears on your ID. If information has already been filled in, check it carefully. Contact the requesting organization if a field is incorrect and cannot be edited.
4. Confirm your phone number if requested
Check the country code and phone number, then request the verification code. Enter the code only in the verification screen. Do not share it with another person.
5. Photograph your ID and take a selfie if requested
Choose an accepted ID type. Photograph the original document with all edges visible and no glare. Capture both sides if prompted. For a selfie, allow camera access, keep your face clearly visible and follow the instructions for the live capture.
6. Finish and check the message
Wait for the final screen and complete any remaining action. Submitting your information does not necessarily mean your identity has passed verification or that the requesting organization has approved your application. Follow its instructions for next steps.
Verification at a glance
This sample diagram shows how a request can progress. Your session may request a different combination or order of checks. Complete only the steps presented on screen.
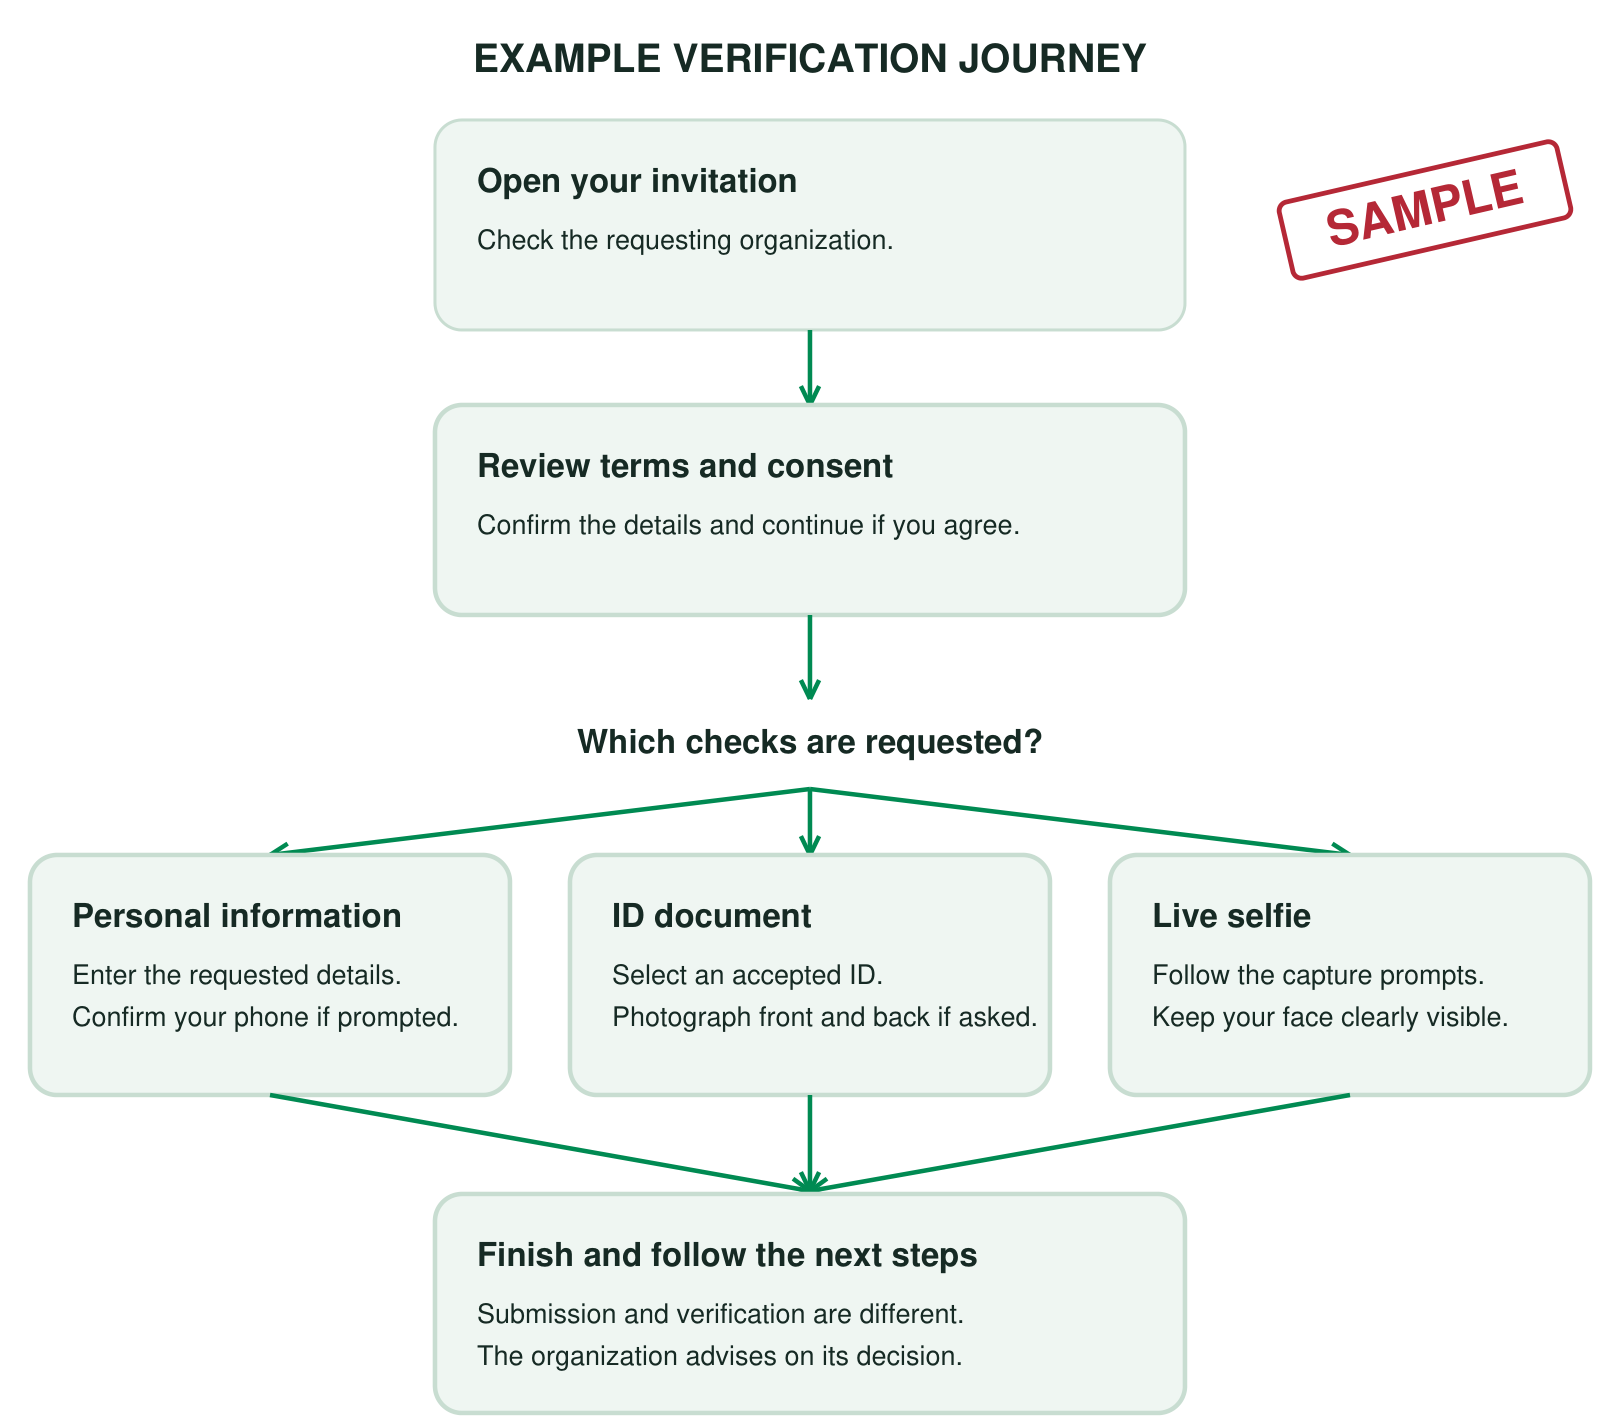
Other enabled methods, including screening and fraud risk checks, may operate in the background. A financial account match, if requested, uses its own account connection and consent instructions.
Sample information screens
These reconstructed mobile screens illustrate the main information steps. All names, contact details and codes are fictional. They are examples for this guide, rather than screenshots of a live verification.
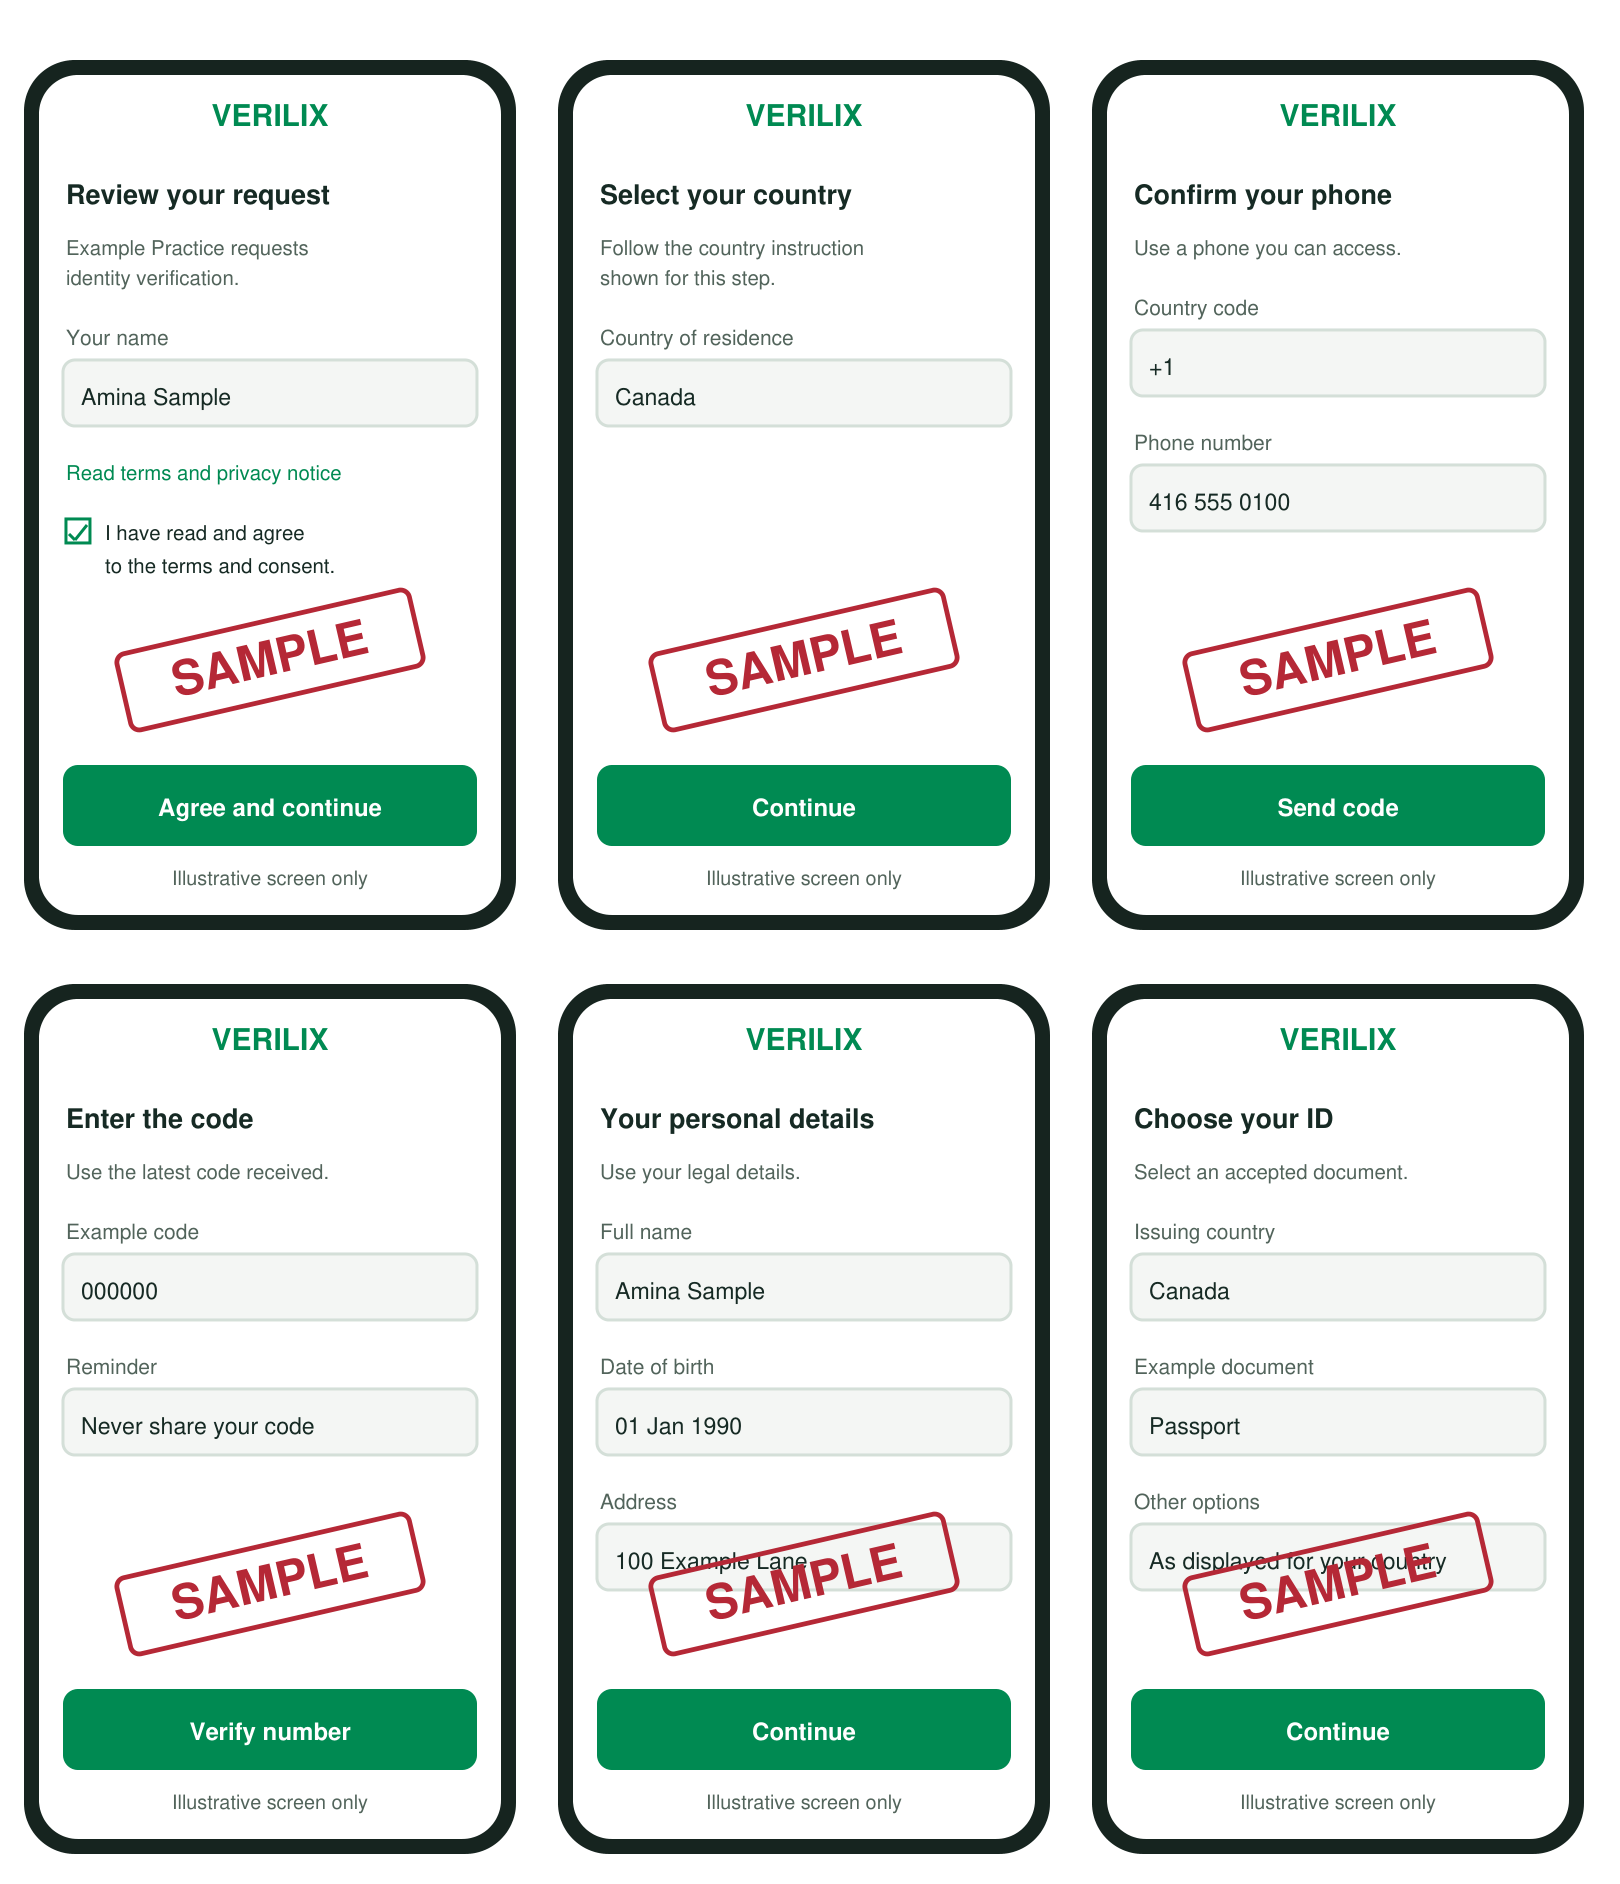
Use your own accurate details in a real session. Country of residence and the country that issued your ID can differ; follow the label for each step. Enter a code only when it has been sent to you for that session.
Sample ID photos and live selfie
These photo examples recreate the document and selfie stages with a fictional person and a demonstration card. Every screen is stamped SAMPLE. The card is not valid identification and is not an example of an accepted ID type.
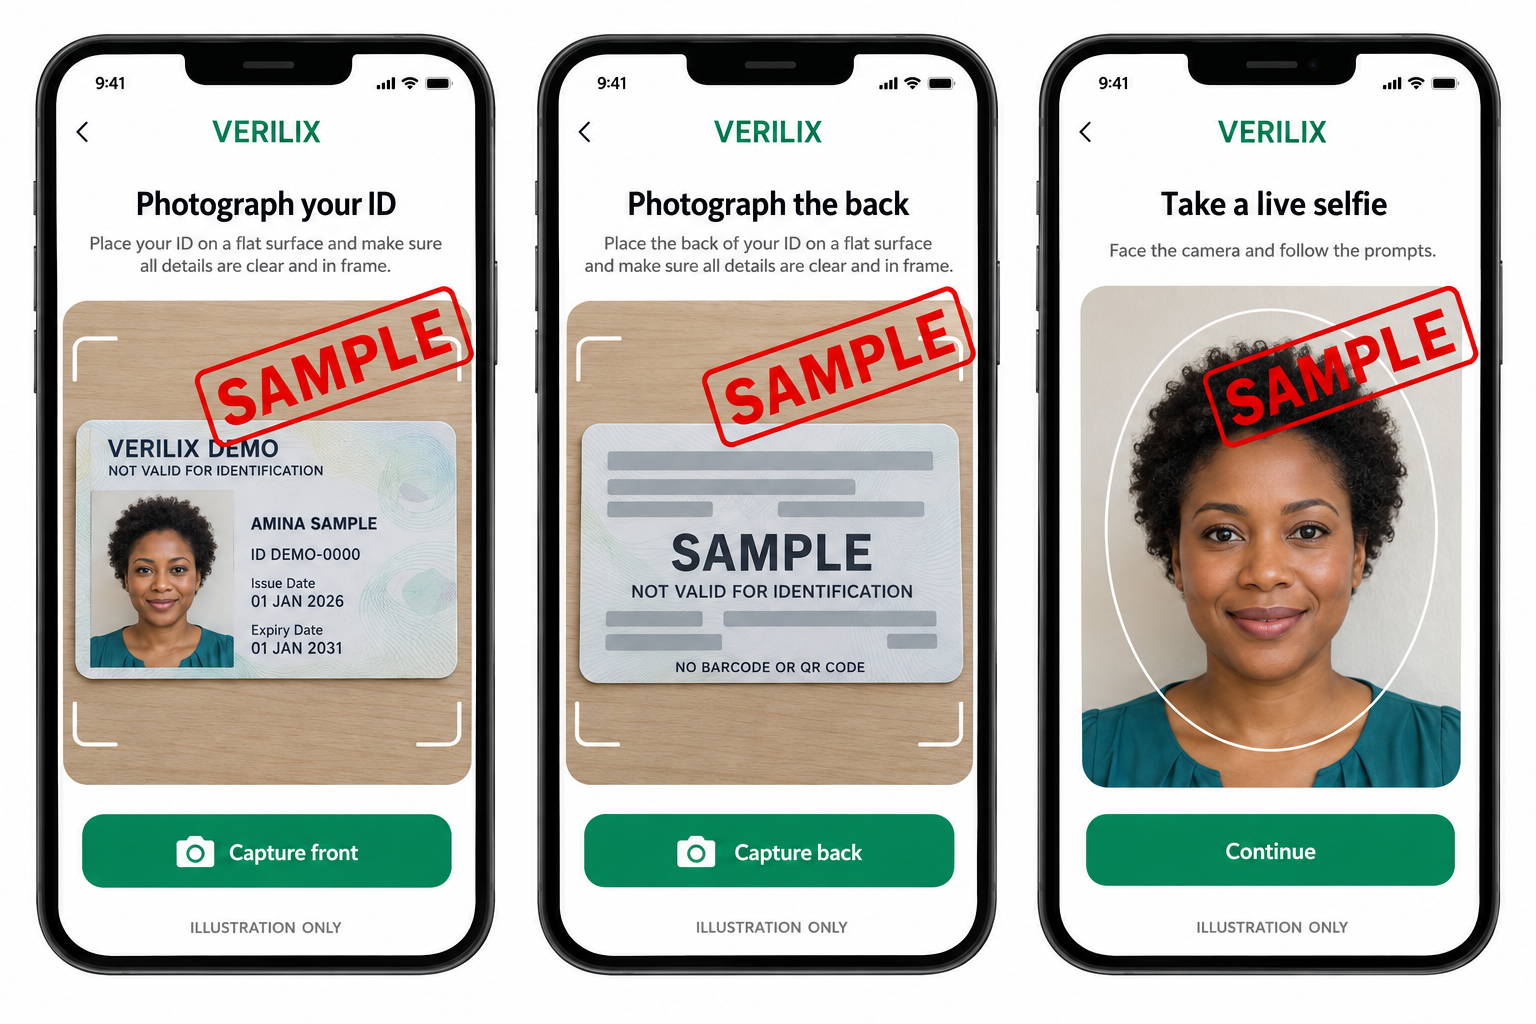
Front of the ID
In a real session, use an accepted original government-issued ID. Keep all edges in frame, with the photograph and text clear.
Back of the ID
Capture the back only if prompted. Ensure any required text and codes on your real ID are clear. Do not obscure or alter the document.
Live selfie
Use the camera when prompted and follow the live instructions. Keep your face visible and use even lighting. Do not upload the example photograph or an existing portrait.
Understanding the result
The requesting organization reviews the verification outcome. A submitted or completed session must not be confused with a successful identity check or approval of a service or application.
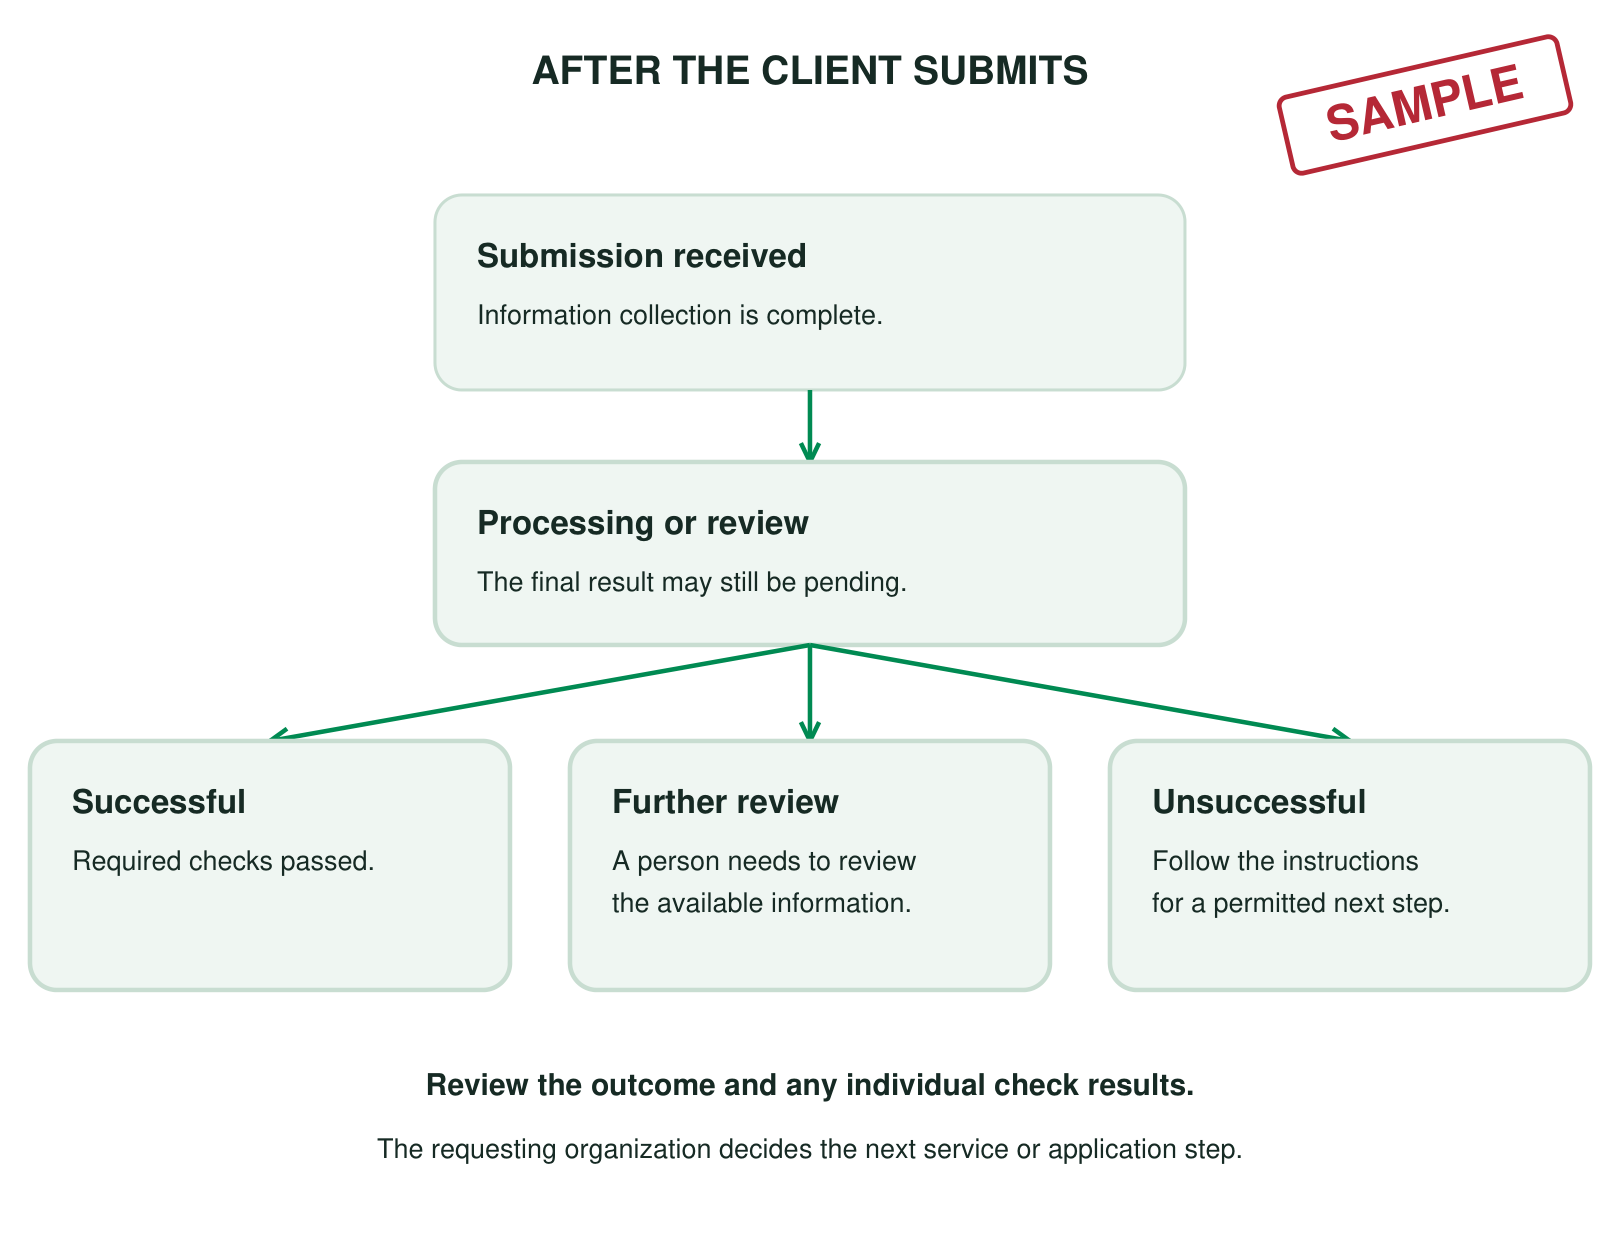
If more information or another attempt is needed, follow the instructions or contact the organization that sent the request. Do not create duplicate paid requests simply because the result is still processing.
User tips and common questions
Tips for a smoother check
Take a clear ID photograph
Place the ID on a flat surface in even light. Keep fingers away from the text and photograph. Clean the camera lens, hold the device steady and check that the image is in focus. Avoid flash glare, shadows and cropped edges. Do not edit the image, use filters or photograph a photocopy or another screen.
Complete a live selfie
Face the camera with light in front of you. Remove sunglasses and anything that obscures your face, where possible. Follow the on-screen prompts rather than submitting an existing portrait. If an accessibility, medical or religious need prevents completion, ask the requesting organization about an alternative process.
The camera does not open
Check camera permission for the verification page in your browser settings. Close other apps using the camera and try again. If the flow offers a QR code for switching to your phone, use it and follow the return instructions.
The code does not arrive
Check the phone number and country code, confirm that you have reception and wait before requesting another code. Use the latest code received.
The ID or selfie is rejected
Read the message, correct the lighting or image problem and retry only if offered. If the problem continues, contact the requesting organization.
Your details cannot be matched
Check spelling, dates and address details. Limited or outdated records can prevent a match. Ask the requesting organization whether an alternative check is available.
The link is unavailable
Open the full original link. If the page still says it is invalid or unavailable, contact the requesting organization for help or a replacement link.
The connection is interrupted
Reopen the original link and follow the instructions. If you cannot resume, contact the requesting organization. Avoid creating duplicate requests.
How long does verification take?
Allow a few minutes to complete the steps. Timing depends on the checks requested, your device, connection and whether further review is needed. A submission can be complete while the result is still being processed.
What happens to my information?
Read the privacy and consent notices for the purpose of collection, who receives your information, retention and contact details. A selfie check can involve facial biometric information. Raise any questions before agreeing.
Who should I contact?
Contact the organization that sent the request. Describe the issue and the step where it occurred. Never share passwords or verification codes with another person. Send ID numbers or photographs only through the verification flow or another approved secure channel.
For workspace users
Guide for organizations
Use Verilix to create a client verification request, arrange completion and review the resulting checks. Available options depend on the selected country and verification workflow.
1. Add or select the client
Sign in to your workspace. Add the client through the Clients page or select an existing client. Check the client’s name and email address before sending a request. Verilix presents the terms and consent request and records the client’s acceptance before verification begins.
2. Choose the verification type
Select the appropriate option shown in your workspace. “Document” checks a government-issued ID. “Complete” adds a live selfie and comparison with the ID photograph. “Selfie Check” uses Data Source Verification and a live selfie without Documentary Verification. If a separate facial verification option is displayed, follow its stated requirements. Other enabled checks may form part of the configured workflow.
3. Select the correct country
For a document request, choose the country that issued the ID. Do not substitute the client’s current country of residence or nationality if it differs. Check the available documents and price before proceeding. For other checks, follow the country instructions shown in that workflow.
4. Choose how the client will complete the request
Select “Send to client” to email a verification link to the client after payment. Confirm the recipient’s address and add an optional message explaining the purpose or requested completion date.
Select “Do it with them now” to begin on the current device after payment while the client is present. Verilix guides the client through the process. The client must personally review and accept the terms and complete any required live capture.
5. Review the price and complete payment
Check the verification type, country, quoted amount and any applicable taxes before paying. Use “Pay and send to client” or “Pay and start verification,” as applicable. Do not assume that creating an account includes a free verification.
6. Review the result
Open the verification record and review the overall result together with the individual checks. Distinguish a request that has been sent, a completed submission, a result still being processed and a confirmed verification outcome. Review any report made available in your workspace.
A successful check provides evidence about the checks performed. It does not establish that every statement made by the client is accurate. Investigate unresolved discrepancies and follow your organization’s decision process.
7. Resolve incomplete or unsuccessful checks
Check the reason provided before asking the client to repeat the process. Correct an input error where permitted, request another attempt if available or arrange an appropriate alternative. Confirm any additional charge before starting another paid request.
Handle information carefully
Limit access to authorized staff. Share results only for the stated purpose and through appropriate channels. Retain records in accordance with your organization’s policy and applicable obligations. Ask the client to use the verification flow for ID images and live captures.
Coverage depends on request
Verification methods and availability
Verilix enables all verification methods in every country where each method is available. Coverage varies by method. The steps shown in an individual request depend on its configuration and the country and document selected.
Personal information checks
Compare requested details, such as name, date of birth, address, phone number and an applicable identity number, against available data sources. A mismatch or limited record history may require another method.
Document verification
Check an accepted government-issued ID for authenticity indicators, expiry and consistency with relevant information provided. Accepted document types vary by issuing country.
Selfie and liveness verification
Check that the capture is of a live person. Where a document comparison is included, compare the selfie with the photograph on the ID. Follow the live prompts on screen.
Phone verification
Confirm access to the supplied phone number using a verification code. Phone access is one part of the verification process.
Fraud risk assessment
Assess available session, device, network and identity signals for possible fraud indicators. These checks may operate in the background and can lead to additional verification steps.
Sanctions and politically exposed person screening
Check identity details against relevant screening lists where included in the organization’s workflow. A possible match requires review; a name match alone does not establish that the person is the listed individual.
Financial account matching
Where included in the request, compare available account ownership information with the verified identity. Follow the separate account connection and consent instructions presented. This check is distinct from confirming identity through an ID or selfie.
Common questions
Do I need to complete every method?
No. Complete the steps requested in your verification session. An organization may use a combination of checks or request additional evidence if an earlier check is inconclusive.
Can I use another language or document?
If a language selector is displayed, choose an available language. Select a document from the accepted options for the issuing country. If your language or document is unavailable, ask the requesting organization about an alternative.
Ready to use Verilix?
Open your workspace to create a client request, review its price and choose how the client will complete the check.